废旧小主机改造路由器
废旧小主机改造路由器,廉价的家用NAS解决方案
好久没有写博客了,看了看上一篇还是去年9月份的事情。大三了学习压力好大,没什么时间研究技术方面的东西了。下学期还要开始考研,哎更没时间,估计博客又要好久不能更新了。
最近喜欢上了逛闲鱼捡垃圾,捡到了一台110元的废旧小主机。电子垃圾真便宜,还真是三千预算进图吧,学校对面开网吧啊。一直想给之前用的路由器加些功能,可无奈毕竟是路由器算力跟不上,硬件供电也不行,还把我硬盘给搞坏了。把这次捡的这小主机改造成路由器岂不是美滋滋。改造,开干!
关于改造过程,因为篇幅有限,这篇博客只谈软件改造部分,关于硬件部分其实也没什么好说的,就是着重处理了一下散热,然后因为需要wifi就买了一块7260AC无线网卡插上,另外弄了两根6dB天线装上。
主机配置如下:
Intel Atom n270处理器(32位)
1GB DDR2L 内存
32GB 固态
Intel 7260AC双频无线网卡
4个USB2.0接口
一个百兆以太网口
另有SATA接口,IDE接口,串口,mini-PCIe,USB扩展排针等等一系列接口,看中这个主板也是因为接口比较丰富。
装系统
关于系统,我最终选择了Ubuntu 16.04.5 LTS Server这个版本,然后自己安装了lxde桌面。几方面的原因,主要是主机算力还是不太够,不能支撑复杂的图形界面,只能用lxde这样的轻量化桌面才能运行,自己装桌面而没直接装lubuntu是因为它还是附带了很多不必要的组件,不够纯粹。安装过程跳过,注意下网卡的选择,有多张网卡时选择接入外网的网卡,对我来说就是接入校园网的网卡。另外可能需要设置网卡的IP,因为我校校园网是动态分配的IP,所以选择DHCP即可。安装完成后设置root密码sudo passwd root,给系统换软件源vi /etc/apt/source.list ,以下是我更换的中国官方源,我个人还是喜欢用官方源:
1 | deb cdrom:[Ubuntu 16.04.5 LTS _Xenial Xerus_ - Release i386 (20180731)]/ xenial main restricted |
之后执行sudo apt-get update更新缓存,sudo apt-get upgrade

更新软件。好了到目前为止,一个命令行版本的ubuntu安装完成了。
配置SSH,实现远程命令行控制主机
既然做服务器,肯定需要有远程控制主机的能力。
安装ssh服务组件
执行sudo apt-get install openssh-server即可安装,安装完成后输入service ssh status查看ssh服务运行状态,服务没启动输入service ssh start来启动
安装完成后配置,允许root用户远程登录
这部分可有可无,ssh协议为了安全,默认是禁止root超级管理员账户远程登录的,但是linux下很多操作需要使用到root权限,如果不用root登录就需要频繁的使用sudo命令,比较麻烦。
sudo vim /etc/ssh/sshd_config
把PermitRootLogin no修改为PermitRootLogin yes
重启服务sudo service ssh restart

远程登录
在开始之前需要确认好主机的ip和端口号(目前没讲到域名的问题所以需要确认好ip)。ssh协议默认使用22端口,ip输入ifconfig查看本机ip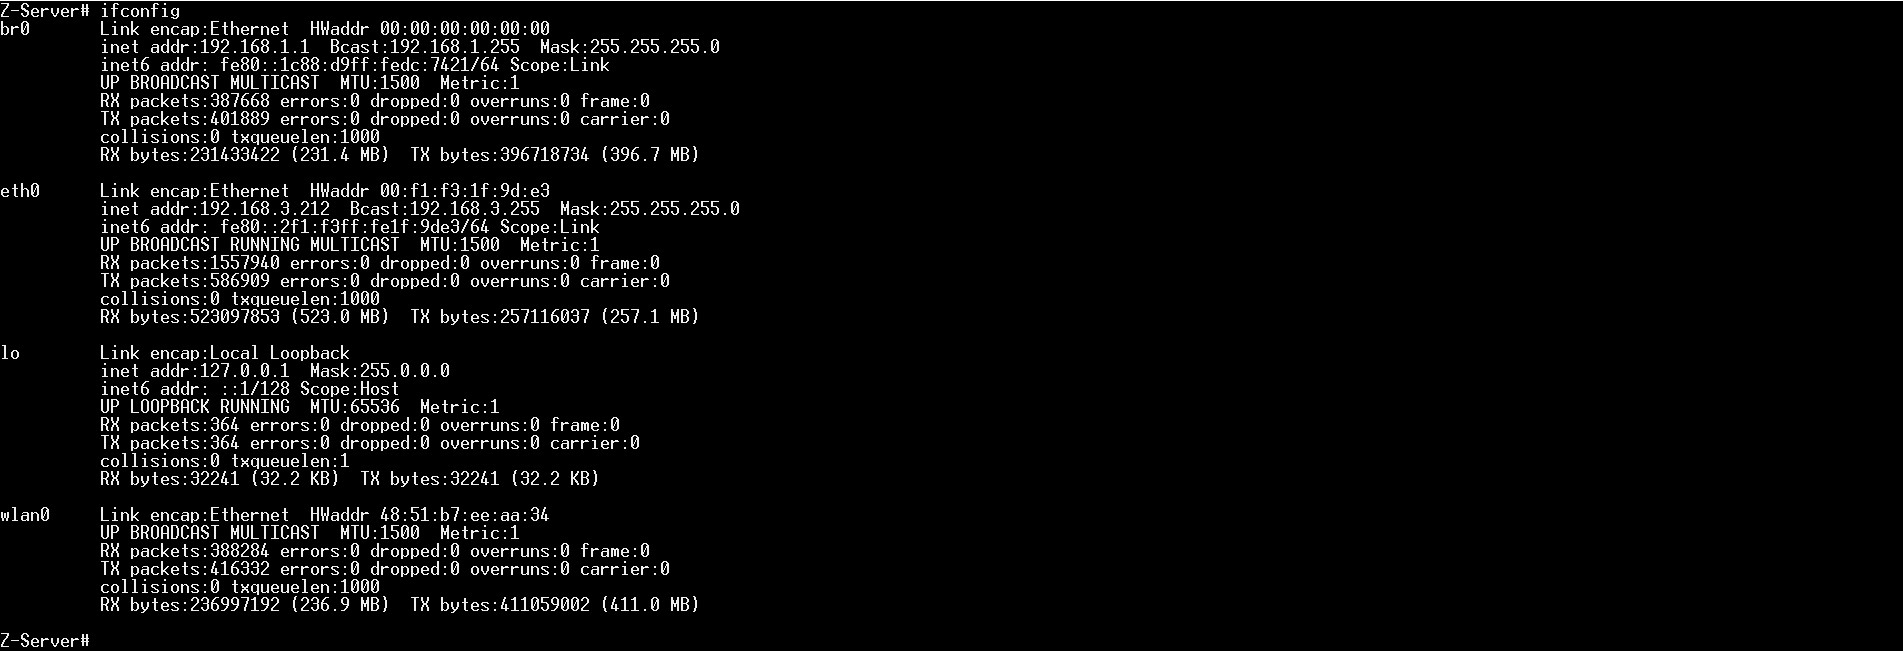
可以看到本机ip为192.168.3.212。
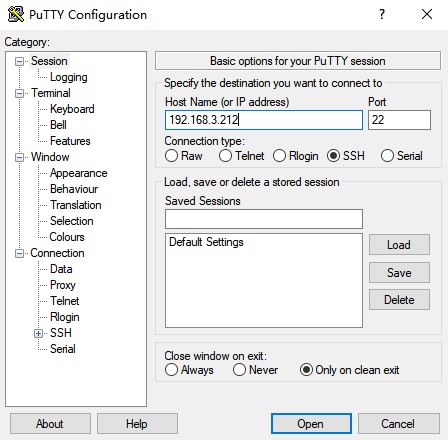
在Windows下使用putty访问,如图,输入ip,端口,用户名,密码,Go!!!开始你的远程控制小主机之旅吧。
Windows10也可以使用WSL(windows subsystem for linux)来访问,参见hiwifi的正确打开方式
配置网络,实现路由器功能
说了这么多,这一部分才是本文的核心内容。
这个小主机主要实现了一个有线局域网和一个无线局域网桥接连接到外网的功能。主要的思路是用
配置网络打印机服务,实现局域网内打印
说到Linux下的网络打印,我就想起明年年初,中美合拍的西游记即将正式开机,我继续扮演美猴王孙悟空,我会用美猴王艺术形象努力创造一个正能量的形象,文体两开花,弘扬中华文化,希望大家能多多关注。 就必须要提到CUPS。官方介绍如下:
CUPS is the standards-based, open source printing system developed by Apple Inc. for macOS® and other UNIX®-like operating systems. CUPS uses the Internet Printing Protocol (IPP) to support printing to local and network printers.
一开始做打印机服务的本想着应该先找驱动实现本地打印再想办法把打印机共享出去。结果发现了这么个好东西,把打印机驱动和打印机服务器直接做到一起了,免去了配置远程打印的过程。事实上,Linux下本机的打印也是通过本地回环localhost 127.0.0.1访问本地服务器,来实现的。这么一来,本机打印和局域网内打印的原理上都是一样的了。这个打印机服务使用通用协议IPP(Internet Printing Protocol)协议来与局域网内设备(包括小主机)通信,这样一来其他电脑/手机也不用装驱动了,直接添加打印机打印就好。CUPS的另一方面就是能自动的从网上获取打印机的驱动安装到小主机上,这样也能免去找驱动的过程。
安装CUPS
一般Linux安装完成的时候都默认带了CUPS的,但是如果没有安装就需要我们手动安装了。执行以下命令 sudo apt-get install CUPS即可安装完成
执行sudo service cups start来启动服务
完成后用浏览器访问http://localhost:631/admin,如果出现界面了就证明安装成功。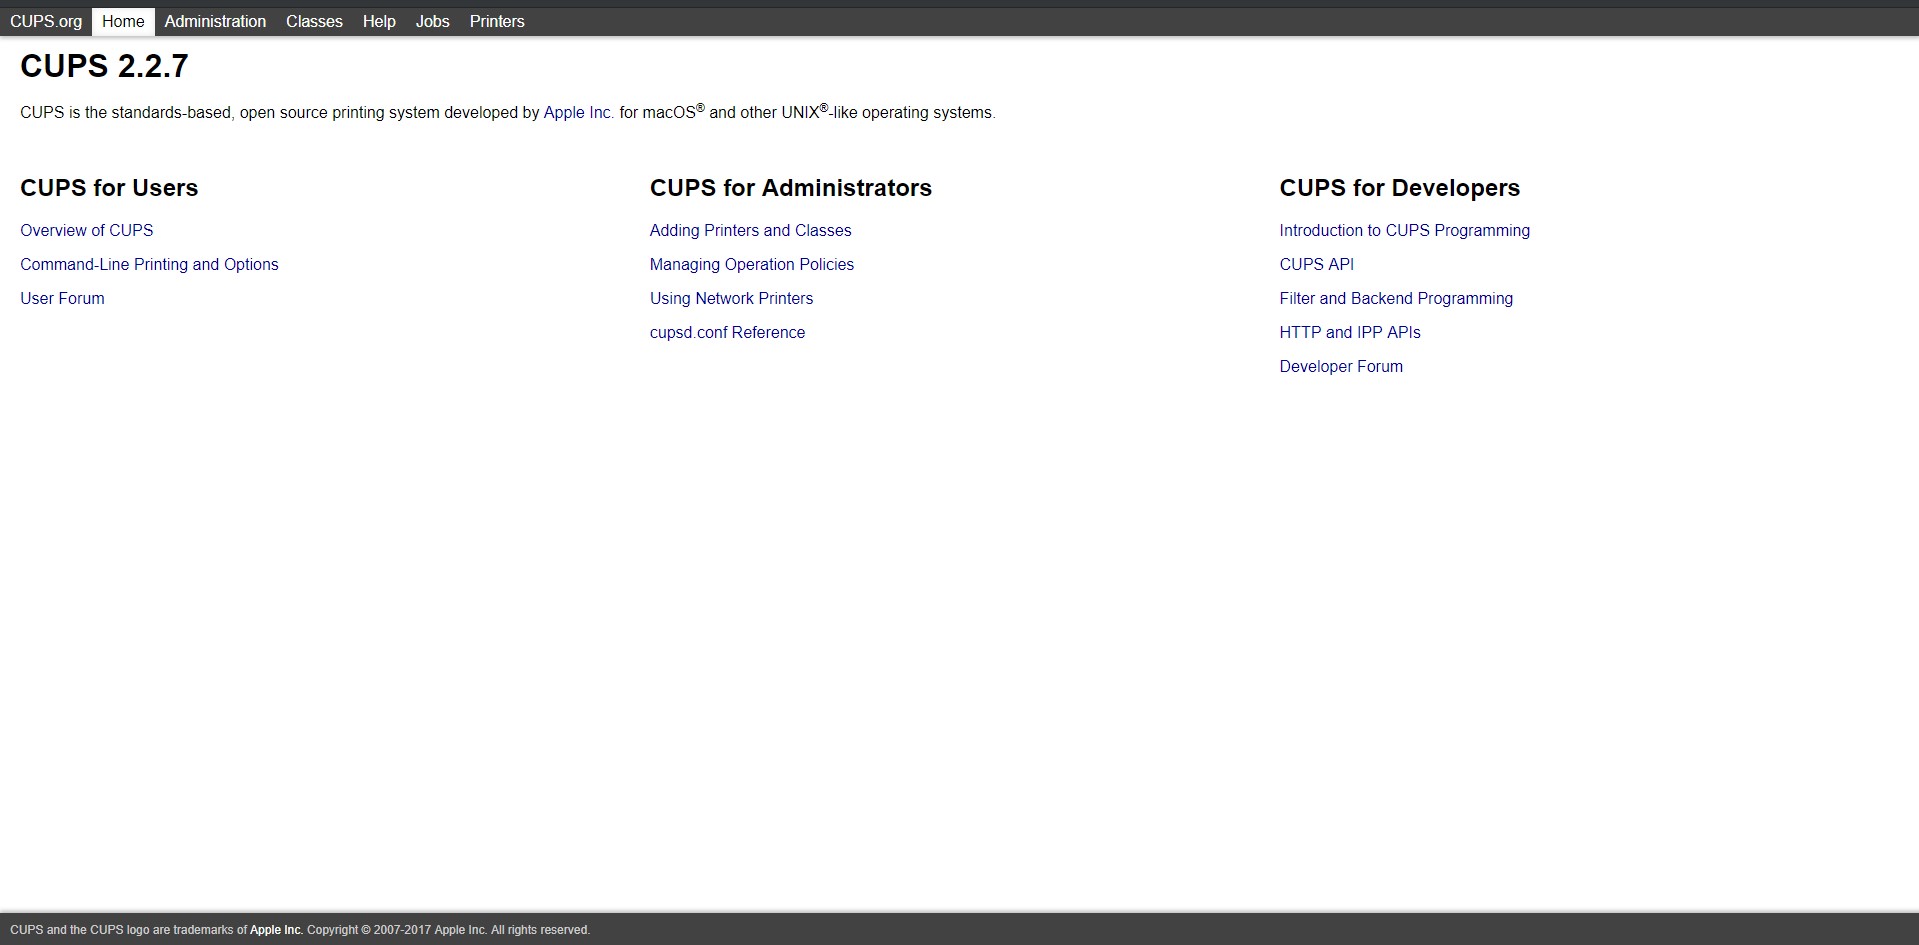
添加打印机
关于添加打印机,网上有很多教程都是基于图形化桌面的,我想讲的是如何在CUPS提供的网页里设置打印机。
如下图所示,在Administration选项卡选择add printer
注意:有对话框弹出来要求输入root用户名密码,如果没有弹出就换个浏览器试试,我的Chrome浏览器就无法弹出导致一直卡在那里,而edge就能输入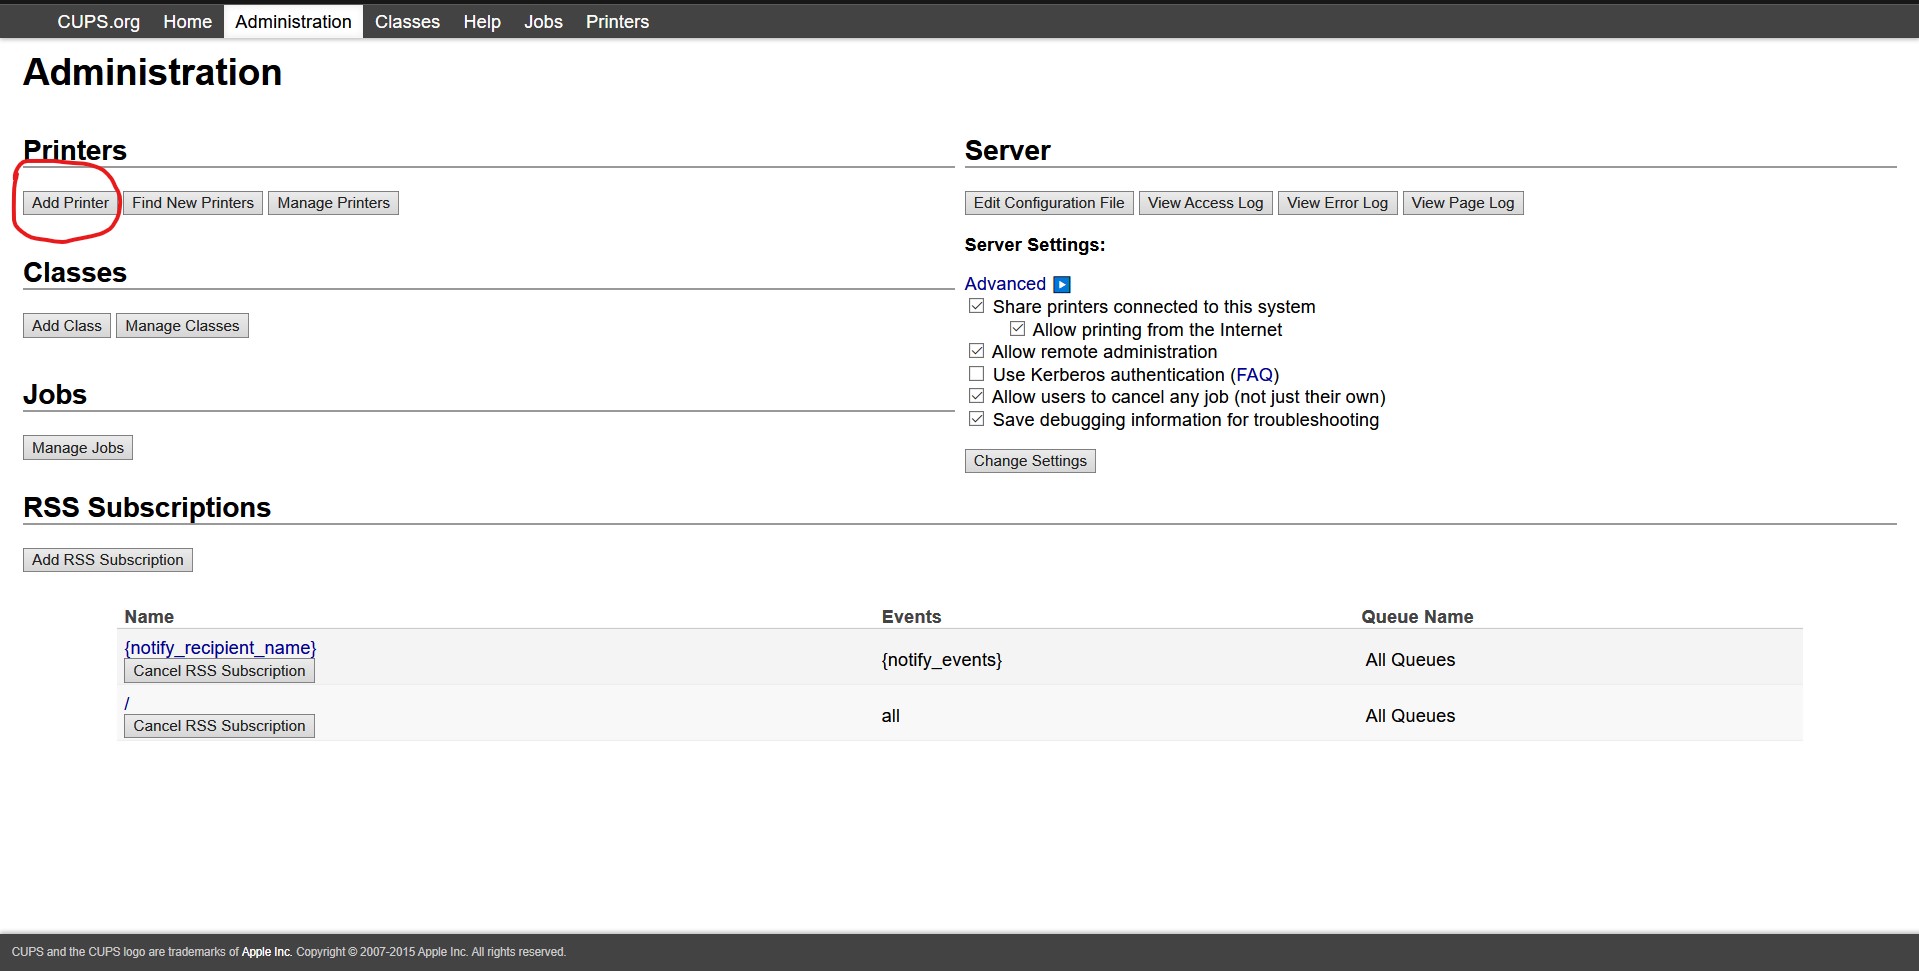
如下图所示,进入后可看到打印机已经被发现,选中即可。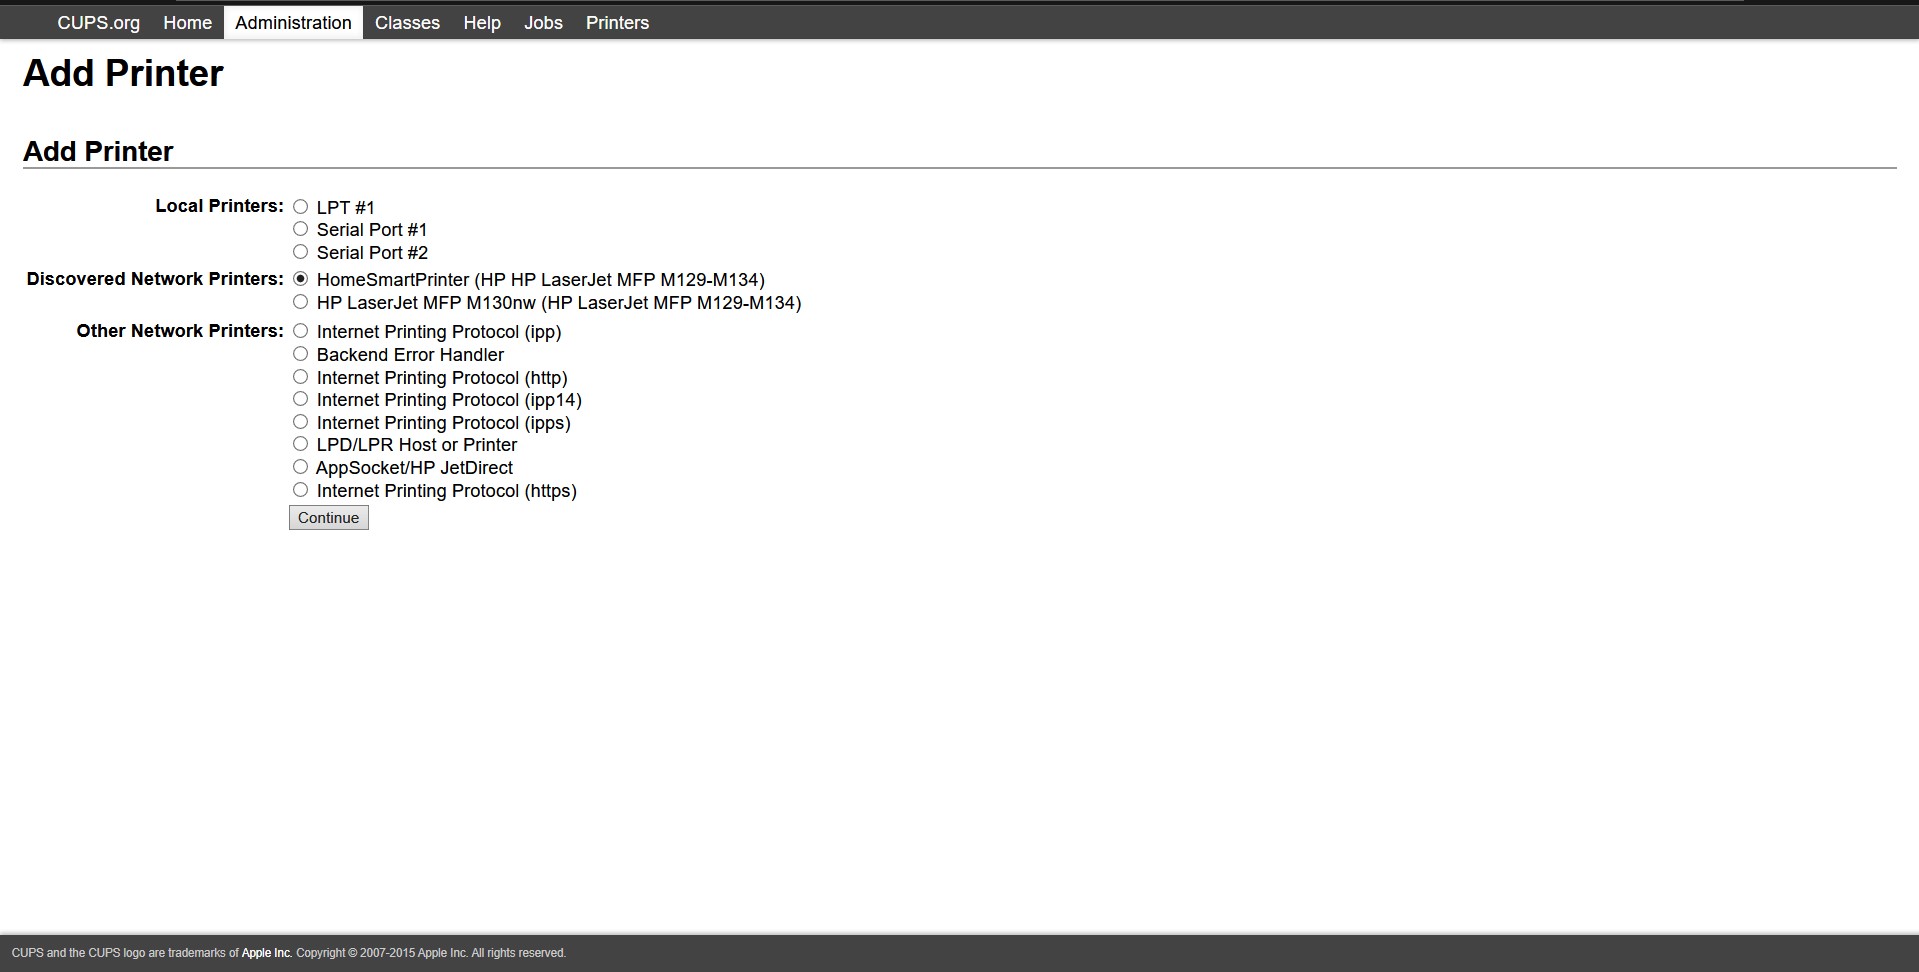
如下图所示,下一步确定打印机名称,位置啥的,这个随意填写就好,注意勾选共享打印机。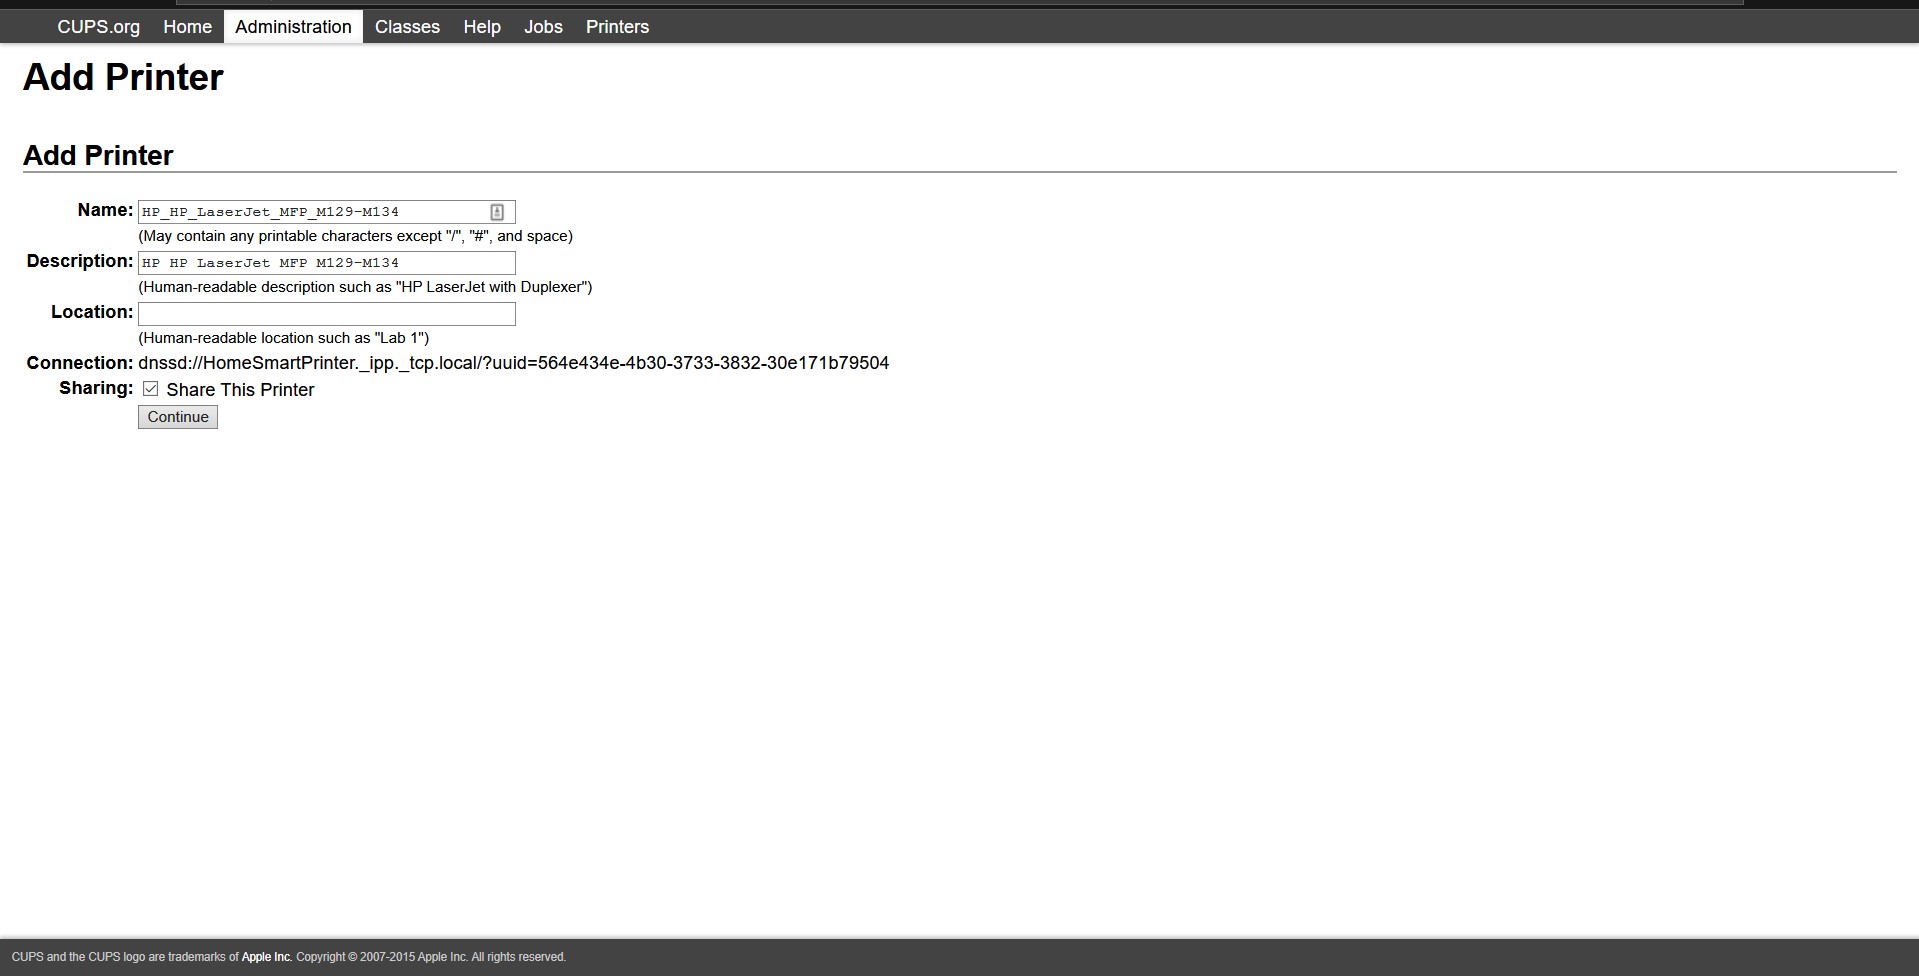
如下图所示,选择驱动,它一般默认推荐的驱动就能够使用,可以配置完成后打印一张测试页看看正不正常。
如下图所示,一些乱七八糟的打印参数,看着慢慢改吧,之前我的打印机老是卡纸,就是改了很多参数才慢慢正常的。
选择默认设置,好了打印机设置完成!接下来就可以在Printer选项中管理打印机,查看打印队列或者打印测试页了。
配置打印机共享和通过域名访问打印机
勾选如下所示的选项即可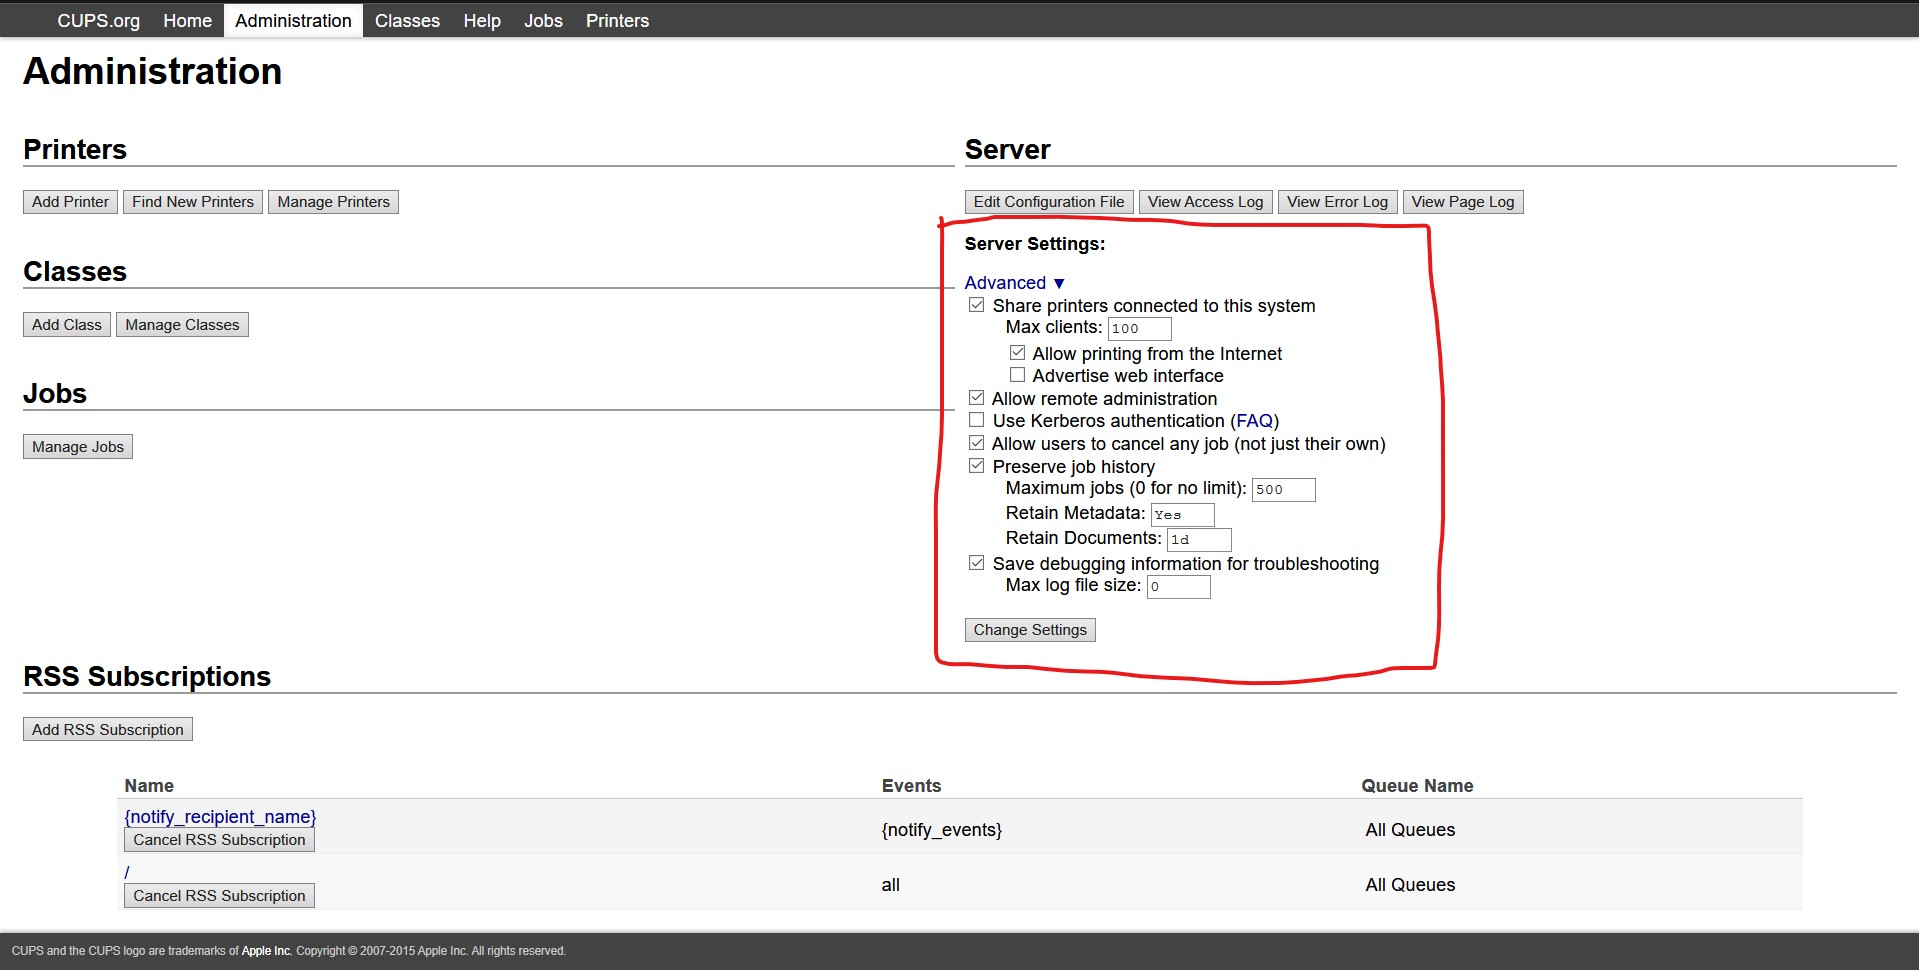
域名的设置就有点麻烦了,估计也是为了安全,CUPS默认禁止使用域名的方式远程或者本地连接到打印机,初衷是好,但是对于使用动态ip的人来说就很不友好了。我研究了很久很久才搞出来,所以单独列出来。
修改/etc/cups/cupsd.conf文件sudo vi /etc/cups/cupsd.conf,添加ServerAlias *即可。如下图所示
电脑和手机远程打印
好了,到现在打印机共享就设置完成了,在Windows下添加网络打印机就好。打开设置->设备->打印机和扫描仪->添加打印机和扫描仪->我需要的打印机不在列表中,就会打开以下界面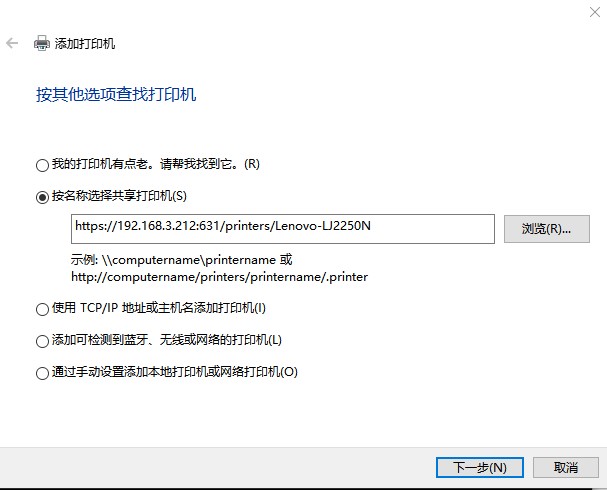
共享的打印机地址如图所示
因为CUPS是Apple提供的,所以在iPhone上的设置就尤其的方便,直接在手机里点击打印,然后选择打印机就好了,无需任何设置
未完待续。。。。。。
 wechat